
Creating Stairs with STYLE (Photos and DIY)
- Jan 24, 2017
- 3 min read
Everyone is coming and going somewhere. We live in a time when we are hardly able to sit still. Sometimes we're going up and sometimes we are heading down. Sounds a bit like life doesn't it? There are UPS and there are DOWNS. I hope you're all having a year so far that is taking you up. I hope you're all going somewhere you want to be.
You know what else can take us up and down?
STAIRS.
Yep, I'm speaking literally here. I go up and down the stairs A LOT in the day. So, hooray for me! I'm always heading somewhere!
Do you have stairs in your house? Are they dark and scary as you take the trip down to the depths of your basement?
Do they look and feel a little like this?

Those stairs creep me out. I know I don't want to be going wherever those stairs are headed.
But my stairs to the basement used to feel like that. It was time to put on my creative brain and figure out a way to lighten and brighten those daily trips I had to take down my stairs. If you've read my previous posts, you know how I feel about wainscoting.
Remember how I said that Wainscoting is my friend?
I meant it.
My stairs were no different when it came to doing some amazing wainscoting. I wanted to add a little texture but not too much. Also, because I was working on stairs, I wanted it to be simple so I didn't die putting it up (ha, ha). Great thinking, huh?
My first step was to envision how I wanted it to look and then come up with a plan. (By the way, that same formula carries over into life. How do you want it to look and what is your plan?)
Once I had a plan, I took my weekly trip to Lowe's and purchased all of the pre-primed MDF I would need. That is all I used for this project. They varied in widths, but it was great and simple shopping. I only had to visit one aisle in the store. Here is how I did it. Better yet, here is the Do It Yourself version so you can do it too if you are looking to do something similar.
1. I started by adding the 6" MDF piece horizontally along the top part of my stairs. This is the piece that the top of my verticle pieces would meet up with.
2. I decided how far apart I wanted each piece of MDF.
3. I then started adding my 4" wide pieces vertically on the wall. I simply nailed them up with my trusty air gun.
4. Once all the pieces were securely nailed and I saw that they were all level and looking good, I caulked each nail hole and each side of each piece of MDF. Caulking, btw, is great exercise for your hands and fingers, in case you were wanting to get them in shape for the new year :)!
5. I then dusted the MDF and prepped them for paint. I painted them a nice glossy white. It added so much brightness to my stairwell and my daily trips down to my basement aren't dark and dreary anymore.


Try adding it to your home, I think you'll like it!
Here is another example of how to use wainscoting to brighten stairs...

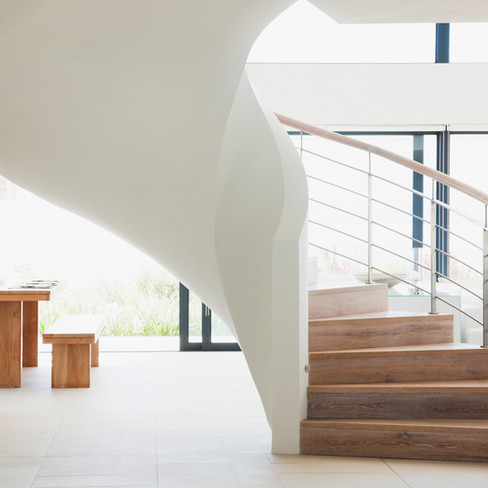
In case you're looking for more inspiration, here is a gallery of stair eye candy. Truly, stairs can act as their own work of art. I love how beautiful stairs can become.
Enjoy these pics from creative minds around the world! Now channel your inner creative, make a plan and start heading UP!


Other Blog Posts of Interest:

Jeana Proctor is a contributing Blogger for PRIME. She is exceptionally great at DIY projects and inspiring others to create value in the home.
Like Prime on Facebook to stay updated on the latest home improvements.
THE PRIME MISSION
We are a boutique Real Estate Brokerage committed to educating our clients how to maximize profits when buying, selling and investing in real estate. We achieve this accord by serving our clients with the heart of a teacher.
From luxury listings to first time home buyers, we dedicate our time, resources and knowledge, to achieve a very personal an rewarding real estate experience.


Comments